Introduction
Tutorial on a way to make a bow for novices? Look no further! Make a Bow is a clean and fun craft that may be used to decorate the front doors, presents, and more. With only some materials and some easy steps, you may create a beautiful bow to upload attraction and persona to any undertaking. In this submission, I’ll guide you via the procedure of Make A Bow step-through-step. And don’t fear if you’re new to crafting – this educational is ideal for beginners! Plus, I’ll offer affiliate links to advocated materials and equipment so that you can effortlessly get started.
Firstly, gather your substances. You will want ribbon (ideally stressed out), scissors, cord cutters, floral wire or pipe cleaners, and optionally a few gildings like beads or vegetation.
To start Make a Bow itself, take the ribbon and fold it into loops. The length of the loops depends on how massive you want your completed bow to be. Once you have made one loop with both ends meeting in the center of the ribbon lengthwise, twist it so that the proper side of the ribbon is dealing with up.
Make a Bow: An Overview of the Craft
Different Types of Bows You Can Make
Loop Bows
Loop bows are the most commonplace form of bow that you can make. They are perfect for gift wrapping and may be made using quite a few substances along with ribbon, wire, or even material. To make a loop bow, start by using cutting a long piece of ribbon. The duration will depend on how huge you need your bow to be. Then, create loops by folding the ribbon backward and forward until you’ve got numerous layers. Secure the loops within the middle with a bit of wire or pipe purifier and fluff out the tails.
Farmhouse-Style Bows
Farmhouse-style bows are first-rate for redecorating wreaths or bushes. They have a country look and sense to them that makes them ideal for adding a few appeals to your house decor. To make a farmhouse-fashion bow, begin by using slicing two long portions of ribbon. The length will depend on how large you need your bow to be. Then, form the ribbons into loops by folding them backward and forward until you’ve got several layers. Use a shorter piece of ribbon to tie the loops collectively in the center and upload tails to each side.
Customized Bows
If you’re searching for something more precise than a trendy loop or farmhouse-fashion bow, remember to customize your layout! You can add links or different decorative portions to give your bow a unique appearance that fits your private fashion or subject matter. For instance, in case you’re Making a Bow for Christmas decorations, take into account including miniature adorns or pinecones to provide it an additional festive touch.
Tips for Making a Bow
Cutting Your Ribbon
When reducing your ribbon, it’s important to use sharp scissors so you get easy edges without fraying. Measure out how a lot ribbon you need before cutting it so you don’t turn out to be losing any material.
Shaping Your Loops
To get perfectly fashioned loops, attempt the usage of something like a fork or a ruler that will help you fold your ribbon frivolously. This will make certain that all of your loops are identical in length and shape.
Securing Your Bow
When securing your bow inside the middle, use a piece of twine or pipe cleanser rather than tying it with ribbon. This will assist hold your bow in the vicinity and save you from coming apart.
Fluffing Out Your Tails
To give your bow a full and fluffy appearance, ensure to fluff out the tails after securing it in the center. You also can trim the ends at a perspective for a greater polished finish.
Types of Bows: Classic Loop, Single Loop, and Triple Loop
Classic Loop Bow: Simple but Elegant
The Classic Loop bow is the most simple kind of bow that you could make. It is best for beginners who are just starting to discover ways to Make A Bow. This kind of bow is characterized by employing its simple and elegant layout, which makes it a famous preference for gift wrapping and redecorating.
To Make A Bow, you may want a ribbon, scissors, and a few pieces of tape. Start by way of slicing a duration of ribbon this is twice the size of the preferred completed bow. Then, create a loop at one stop of the ribbon and twist it inside the middle to form two loops. Finally, tie the twisted component with any other piece of ribbon to steady it in location.
One advantage of Make a Bow is that it can be without problems custom designed in line with your desire. You can pick out exceptional shades and styles of ribbons to healthy your gift or decoration subject matter. Moreover, this sort of bow can also be used as an embellishment for different crafts including hair accessories and domestic decor.
Single Loop Bow: Adding Elegance
If you need to add a further layer of beauty to your completed product, then the Single Loop bow is probably the ideal choice for you. This kind of bow is much like the Classic Loop however with an extra loop on top that creates a layered effect.
To Make A Bow, comply with the same steps as Make a Bow but upload a further loop on the pinnacle earlier than tying it with any other piece of ribbon. You can modify the dimensions and form of each loop depending on your desire.
One component to keep in mind while Making a Bow is that it requires a greater interest in the element compared to the Classic Loop. You want to make certain that every loop is aligned properly and has enough space among them for better visible appeal.
Triple Loop Bow: Intricate Beauty
The Triple Loop Bow is taken into consideration as one of the maximum complicated types of bows as it requires superior talents in Make a Bow. This form of the bow is characterized by its three layers of loops that create a lovely and fantastic result.
To make a Triple Loop Bow, you will need a longer ribbon compared to the Classic and Single Loop bows. Start by way of creating 3 loops of different sizes and stacking them on top of every different with the most important loop at the bottom. Then, tie the loops together with another piece of ribbon to steady them in location.
One venture while Make a Bow is maintaining symmetry and stability among each loop. You want to make certain that every loop is aligned well and has sufficient space between them for better visual attraction.
Simple Bows: Single Loop and Twist Bow Techniques
Single Loop Technique: Creating a Simple Bow
To create a simple bow usage of the single loop approach, start by cutting a length of ribbon for your favored size. Hold the ribbon among your palms at an angle and fold it over itself to create a loop. Make A Bow sure that the tail of the ribbon is lengthy sufficient for your needs.
Next, twist the ribbon so that the right facet faces up and create another loop with it. This 2d loop has to be slightly smaller than the first one. Repeat this method until you have got created as many loops as you prefer.
Once you’ve got made many loops, tie them together with a knot phase. Ensure that the knot is tight enough to maintain all the loops securely in place however now not too tight that it distorts their shape.
Finally, trim any excess ribbon tails with sharp scissors and fluff out every loop to present your bow its very last shape.
Twist Bow Technique: Adding Flair to Your Bows
The twist bow technique adds aptitude to your bows by developing unique styles within them. To Make A Bow this kind of bow, cut a period of ribbon and preserve it between your palms at an angle like earlier.
This time, but, as opposed to folding over itself to create loops, twist one end of the ribbon clockwise whilst twisting the opposite cease counterclockwise. Keep twisting till you have created numerous twists on each side.
Now fold every twisted end over itself to shape separate loops in opposite instructions. Secure those loops together by tying them in the region with either zip ties or string.
If you want more complexity for your twist bow design, upload small facet loops on either side of the center loop using repeating this process with smaller lengths of ribbon. These side loops may be secured with the usage of zip ties or string just like before.
Double Loop Bows: Step-by using-Step Guide for Wreaths and Decorations
Creating a double-loop bow is a high-quality manner to feature a touch of elegance and sophistication on your wreaths and other decorations. The procedure might also appear daunting in the beginning, but with a little exercise, you’ll be able to create lovely double-loop bows very quickly.
Step 1: Choose Your Ribbon
The first step in creating a double-loop bow is choosing the right ribbon. You’ll need to pick out a ribbon that is at a minimum of 2 inches extensive and has a little stiffness to it. A stressed-out ribbon works excellently for this type of bow because it will keep its form better than other styles of ribbon.
Step 2: Create Two Loops
Once you’ve decided on your ribbon, it’s time to start creating your bow. Begin by way of Making a Bow loop of the same size as your ribbon. Hold one cease of the ribbon between your thumb and forefinger, then make a loop using bringing the ribbon over itself. Use your other hand to keep the center of the loop in place whilst you create the second loop on the other side.
Step 3: Cross Over and Knot
With both loops created, cross them over each other within the middle. Take the lowest loop and bring it up and over the top loop, then pull tight to create a knot inside the middle of the bow.
Step 4: Repeat for Second Set
Now that you have one set of loops and a knot in the vicinity, it’s time to copy the procedure on both sides of the knot. Create more loops of equal length on both aspects of the knot with the use of the same approach as before – Make a Bow certain they’re even in size.
Step 5: Adjust Loops and Tails
Once you’ve got all four loops created, alter them as had to acquire your preferred appearance. You can also adjust the tails (the ends of your ribbon) by way of trimming them or leaving them long relying upon your preference.
Choosing the Right Ribbon
Before we dive into how to Bow and fix twine for striking your stressed-out ribbon bow, it’s vital to pick the right ribbon. Wired facet ribbon is the satisfactory choice for developing these sorts of bows because it has a skinny cord strolling along the edges that enables maintain its form. When selecting your ribbon, recollect the shade and pattern to satisfactory supplement your challenge.
Making Your Wired Ribbon Bow
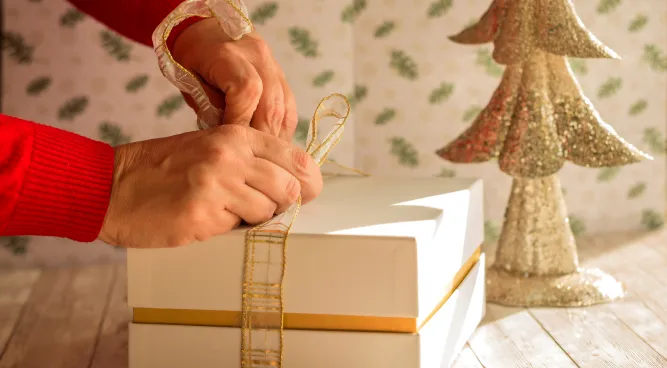
To Make A Bow, you may need a floral cord and wired facet ribbon. Cut a period of floral twine and fold it in half. Then, thread the folded end thru the middle of your wired side ribbon and twist the cord to stable it in the area. Next, create loops on either side of the center twist with the aid of folding every facet of the ribbon again onto itself till you have created two loops of identical size. Pinch every loop at its base with one hand at the same time as the usage of your other hand to create any other twist with the floral twine around each loop.
Attaching Wire for Hanging
Once you’ve got created your lovely stressed ribbon bow, you can need to connect a few additional twines so that it can be hung from various surfaces including walls or doors. To do this, take another piece of floral wire and wrap one end around one aspect of your authentic twisted center knot at the backside of your bow. Twist this new piece of floral cord tightly around itself numerous instances till secure before bending into an open loop form.
Using Hot Glue
If you don’t want to apply extra wires for placing but still need to attach your wired ribbon bow to a challenge, you could use warm glue. Simply follow a small quantity of warm glue onto the backside of your bow and press it firmly onto your desired surface.
Bouquet Bows and Rustic Christmas Wreaths: DIY Tips and Tricks
Burlap Ribbon: The Key to a Rustic Christmas Wreath
If you’re seeking out a way to add some rustic attraction to your Christmas decor, look no similarly than burlap ribbon. This versatile fabric is best for developing wreaths that can be both festive and comfy. Here are a few guidelines for the usage of burlap ribbon on your DIY wreath-Make a Bow:
• Choose the right width: Burlap ribbon is available in lots of widths, from as narrow as 1 inch to as huge as 6 inches or more. For a wreath, you’ll need to pick a width that’s proportional to the dimensions of your wreath form. A 12-inch wreath may look first-rate with a 2-3 inch ribbon, while a larger wreath ought to handle a wider ribbon.
• Add wire for structure: Burlap may be floppy and hard to work with if it’s no longer strengthened with a cord. To make certain your bow holds its form, use stressed-out burlap ribbon or add floral wire to the returned non-stressed ribbon before shaping it into loops.
• Mix and suit textures: Burlap pairs nicely with other herbal materials like pine cones, berries, and twigs. Incorporate those factors into your wreath design along with the burlap for a cohesive appearance.
DIY Your Own Christmas Wreath
Making a Bow for your personal Christmas wreath is simpler than you would possibly suppose! With just a few materials and a little creativity, you could create a one-of-a-kind ornament to provoke all of your holiday visitors.
Here’s what you’ll want:
• A wreath form (you can find these at craft shops)
• Floral wire
• Greenery (real or synthetic)
• Decorative factors like pine cones or berries
• Ribbon (burlap or otherwise)
To assemble your wreath:
1. Start by attaching greenery to the wreath shape with the usage of floral twine. Work in small sections, wrapping the cord around the stems of the greenery and securing it to the form.
2. Once you’ve got a base layer of greenery, add on your ornamental factors. Use floral twine to connect pine cones, berries, or other gadgets to the wreath.
3. Finally, add a bow made from ribbon to complete your wreath. You can use burlap ribbon for a rustic appearance or pick every other form of ribbon that complements your decor.
Pro tip: If you’re the usage of actual greenery, mist it with water every few days to maintain it fresh in the course of the holiday season.
Gift Wrapping and Tree Decorating with Burlap Ribbon
Burlap ribbon isn’t only for wreaths – it’s additionally a super desire for gift wrapping and tree redecorating! Here are some thoughts for incorporating burlap into your holiday decor:
• Use leftover ribbon scraps to tie bows on items. The herbal texture of burlap pairs well with kraft paper or other rustic wrapping materials.
• Wrap burlap ribbon around your Christmas tree as garland. For a further festive touch, add in some mini pine cone adorns or different natural decorations.
• Tie easy bows out of burlap ribbons and fasten them to tree branches as adorns. This is an easy DIY undertaking that even children can help with!
With those tips and hints, you’ll be well in your manner of growing a comfortable and festive excursion atmosphere in your property. Whether you’re Make Bow wreaths, wrapping gifts, or redecorating your tree, don’t be afraid to get creative with burlap ribbon!
Buying Ribbon for Make A Bow: Best Places and Types of Ribbon to Use
Satin Ribbon: The Favorite Ribbon for Make A Bow
Satin ribbon is a famous choice among crafters Make a Bow it is easy to locate the suitable color for any challenge. Satin ribbon is versatile and may be used to create each large and small bows.
When deciding on a satin ribbon for Make A Bow, it’s critical to bear in mind the width of the ribbon. Wide ribbon works well for growing larger bows, while thinner ribbons are best for smaller bows or accents. The satin ribbon also is available in various widths, so there are lots of options to pick from relying on the preferred length of the bow.
Different Ribbons for Different Occasions
While satin ribbon can be a favorite amongst crafters, many other forms of ribbon can be used to create stunning bows. Plaid ribbon adds a country touch to bows and is ideal for fall or winter-themed tasks. Buffalo test ribbon is any other kind of checkered sample which could add a classic and undying look to bows.
When looking for plaid or buffalo check ribbons, do not forget to search thrift stores or online shops as they’ll have precise and affordable alternatives. Craft shops also carry plaid and buffalo check ribbons, however, might have restrained color alternatives.
Wide Ribbon: Perfect for Large Bows
The wide ribbon is a wonderful alternative when creating huge bows along with those used in wreaths or garlands. It provides greater floor area to work with than thinner ribbons, allowing you to create fuller-searching bows with greater loops.
When the usage of wide ribbons, it’s critical to make sure that the bow doesn’t turn out to be too heavy or bulky. To save this from happening, use twine-edged ribbon as it affords additional assistance and enables preserve the form of the bow.

Mastering the Art of Make a Bow
Selecting the Perfect Ribbon
The first step in learning the art of Making a Bow is choosing the appropriate ribbon. When choosing a ribbon, recall the event and shade scheme. For example, if you are Making a Bow for Christmas, pick a ribbon with red and inexperienced colorings or a buffalo test sample to provide it that festive feel. If you are developing a bow for a wedding or formal event, choose a ribbon with a fashionable layout or steel end.
After selecting your ribbon, degree it to the favored period. An accurate rule of thumb is to use one backyard of ribbon in step with every inch of finished bow size. If you need to make a four-inch bow, use four yards of ribbon.
Creating Loops and Tails
Once you have selected your ribbon and measured it to the favored duration, it’s time to begin creating loops and tails. To try this, keep the cease of your ribbon on your left hand and create a loop along with your right hand by bringing the proper side of the ribbon over to satisfy the left aspect at approximately halfway factor.
Next, carry the right facet up and over to create another loop on top of the primary one. Repeat this method until you have created as many loops as favored in your bow length.
After developing loops, pinch them together in your left hand whilst retaining both ends of the tail with your right hand. Make sure that every loop is identical in length and width before tying it off with twine or string. great post to read about Change Name on Facebook.
Adding Finishing Touches
To upload completing touches to your ideal bow, attach a tree topper or buffalo take a look at the ribbons at the center by way of wrapping them around in which you tied off wire/string earlier. This will supply greater dimensionality and texture that allows you to make it stand out even extra!
Finally, trim any extra edges from tails with the use of scissors so that they’re even in the period before fluffing up each loop in my view until they look fully sufficient without being too bulky – don’t forget much less is greater!

FAQs About Make a Bow
How do you make an easy bow?
To make a simple bow, you’ll want a ribbon, cord, and scissors. Cut the ribbon to your favored length, then create a loop at each end and stable it with wire. Fluff up the loops and regulate them to your liking.
How do you make a perfect bow?
To make an excellent bow, use a ribbon with twine edges to help hold its shape. Create two loops of equal length, pass one loop over the other, and bring it up and through the middle hole. Tighten the bow and adjust the loops to create a symmetrical form.
What is the easiest bow to make?
The easiest bow to make is an easy loop bow. Cut a ribbon on your favored duration, make a loop on one end, then twist the ribbon and make a loop on the other stop. Secure the two loops together with a wire or thread.
How to do a bow?
To do a bow, you will need a ribbon and a couple of scissors. Cut the ribbon to your desired length, then create identical loops and cross one over the alternative. Bring the pinnacle loop in the back of the lowest loop and tie a knot inside the center to steady it in the region. Fluff up the loops and regulate them to your liking.
Table: Make A Bow
| Bow Type | Materials Needed | Steps |
|---|---|---|
| Simple Loop Bow | 1. Cut the ribbon to the desired length. 2. Make a loop on one end. 3. Twist the ribbon and make a loop on the other end. 4. Secure the two loops together with wire or thread. | 1. Cut the ribbon to the desired length. 2. Create a loop at both ends and secure with wire. 3. Fluff up the loops and adjust as desired. |
| Simple Bow | Ribbon, Scissors, Wire | 1. Cut the ribbon to the desired length. 2. Create two equal loops and cross one over the other. 3. Bring the top loop behind the bottom loop and tie a knot in the center. 4. Fluff up the loops and adjust as desired. |
| Perfect Bow | Ribbon with Wire Edges, Scissors | 1. Create two equal loops of the same size. 2. Cross one loop over the other and bring it up through the center hole. 3. Tighten the bow and adjust the loops for symmetry. |
| Knot Bow | Ribbon, Scissors | 1. Cut the ribbon to the desired length. 2. Create a loop at both ends and secure it with wire. 3. Fluff up the loops and adjust as desired. |
Make a Bow: Final Thoughts at the Craft
In the end, Make a Bow is an art that requires endurance, creativity, and interest in elements. Whether you’re developing a simple unmarried loop bow or a complex triple loop bow, it is easy to add the ideal final touch to any venture.
When Make A Bow, it’s critical to pay close interest to the tail phase and ends of the ribbon. These areas could make or wreck the final look of your bow. By taking the time to nicely form and trim those sections, you may ensure that your bow looks polished and professional.
Throughout this post, we have explored diverse techniques for Make A Bow one-of-a-kind types of bows along with conventional loop, single loop, double loop, and stressed-out ribbon bows. We’ve additionally discussed recommendations for buying ribbons and shared DIY ideas for wreaths and decorations.
As with any craft, practice makes ideal on the subject of Make a Bow. Don’t be afraid to experiment with special patterns and substances till you locate what works satisfactorily for you. And don’t forget – there’s no proper or incorrect way to make a bow as long as you’re happy with the cease result.
So whether or not you’re seeking to add some aptitude for your present wrapping or create lovely decorations for your home or event, learning the artwork of Make a Bow is certain to electrify. With those hints and tricks in mind, move forth and create lovely bows so that they will depart everyone in awe!

Jasper Bruxner is a passionate and versatile blogger with a keen eye for trends and a knack for crafting engaging content. As the founder of WendyWaldman.com, he has established himself as a trusted resource in a diverse range of niches, including food, tech, health, travel, business, lifestyle, and news. He tends to share the latest tech news, trends, and updates with the community built around Wendywaldman. His expertise and engaging writing style have attracted a loyal following, making him a respected voice in the online community.