
Introduction
Split display on Mac is a function that lets users view two apps or home windows aspect by side at an equal display. This feature may be activated using numerous strategies, along with keyboard shortcuts and trackpad gestures. The split display is on hand for multitasking and increasing productiveness on Mac computers.
To spark off Split Screen on Mac, you could use one in all several methods. One way is to click and keep the inexperienced full-display button in the pinnacle-left corner of an app window until the window shrinks and you see your desktop. You can then drag any other app window onto both aspects of the display to create a split view.
What is Split Screen on Mac?
Increase Productivity with Split Screen on Mac
Multitasking is crucial in these days’ rapid-paced international, and the Split Screen on Mac will let you achieve it. With this feature, you may view two packages facet-via-side to your display. In this manner, you could work on a report even as preserving an eye on your email or chatting with a colleague even browsing the internet. Get more info about Use apps in full screen on Mac.
Activating Split Screen is simple. All you need to do is click on and hold the green full-display screen button in the top left nook of an application window. You can then select which application you want to pair with the current one or pick it out from a listing of open applications.
The beauty of Split Screen on Mac lies in its simplicity and ease of use. It lets you paint more efficiently by using decreasing the time it takes to exchange among applications. Moreover, it allows preserving your workspace prepared and litter-free, making it less difficult to attention to what topics maximum.
Customizing Your Split Screen Setup
One of the best matters approximately Split Screen on Mac is that it’s customizable. You can modify the size of every utility window by using dragging the divider between them. This approach that you can allocate more space to 1 software if wished, relying upon your workflow.
Another useful characteristic is Mission Control, which lets you look at all open home windows and spaces at once. To access Mission Control, swipe up with three palms on your trackpad or press F3 on your keyboard. From there, you could drag home windows among areas or create new ones as wanted.
Split Screen also works seamlessly with multiple displays. If you have got video display units related to your Mac, for instance, you could use Split Screen on each screen concurrently.
Boosting Your Productivity with Keyboard Shortcuts
If you’re trying to take your productivity game up a notch, don’t forget to use keyboard shortcuts for Split Screen on Mac. Here are a few beneficial ones:
- Control + Up Arrow: Enter Full-Screen mode
- Control + Left Arrow: Move the contemporary window to the left facet of the screen
- Control + Right Arrow: Move the present-day window to the proper aspect of the screen
- Control + Down Arrow: Exit Full-Screen mode
Using keyboard shortcuts can prevent time and make your workflow greater green. It’s worth taking some time to examine them if you haven’t already.
Using the Split Screen Shortcut
Split display screen mode is a remarkable manner to multitask on your Mac. It permits you to use two separate spaces at an equal time, making it less complicated to paint on one-of-a-kind tasks concurrently. However, coming into Split Screen on Mac mode can be a bit problematic in case you don’t know the shortcuts. In this phase, we’ll discuss a way to use the breakup screen shortcut and why it’s the last way to do cut-up displays on your Mac.
Entering Split Screen Mode
To input cut-up screen mode, there are two shortcuts that you may use. The first one is by using clicking and maintaining the full display button in the pinnacle left nook of a window. This will reason the window to reduce and pass to either facet of your laptop. You will then see all the different open home windows in a grid view on the alternative side of your computer. From there, click on some other window that you need to use in break-up-screen mode.
The second shortcut is through urgent and preserving the inexperienced complete screen button for your mouse or trackpad. This may also reason the window to shrink and flow to both aspects of your laptop, much like the use of the first shortcut.
Adjusting Split Screen Size
Once you’re in break-up display screen mode, you could alter the size of each half by dragging the divider line between them. Simply click on and keep at the divider line and drag it left or proper till you get your preferred length for each half.
Exiting Split Screen Mode
To exit Split Screen on Mac mode, simply click on the inexperienced full-screen button again or use some other shortcut: press and preserve down Esc key.
Why Use Split Screen Shortcuts?
Using Split Screen on Mac shortcuts is a great deal faster than manually resizing home windows or the usage of Mission Control (F3) to switch between apps. It saves time because it gets rid of unnecessary steps while putting in place a break-up-screen view.
Another purpose why the usage of shortcuts is higher than manual resizing is they permit extra precision whilst adjusting window sizes. With manual resizing, it can be tough to get the precise length you need for every 1/2 of the screen. However, with shortcuts, you may without difficulty adjust the size by dragging the divider line until you get your preferred size.

Adjusting Window Size and Entering Split View
Tile Windows for Effective Multitasking
When operating on a Mac, you may need to work with more than one home window at the identical time. To make this easier, you could tile windows by dragging them to the corners of the display screen. This permits you to view home windows facet-via-facet without manually resizing them. By doing so, you may keep time and growth your productivity.
Entering Split View: A Quick Guide
Split View is a feature that lets you paint with apps or windows simultaneously in complete-display screen mode. Here’s the way to input Split View:
- Click and keep the inexperienced complete-display button at the pinnacle left of the window.
- The window will reduce and flow to one facet of the display screen.
- Release the mouse button.
- Select some other window from Mission Control or click on any open app in Launchpad.
- The 2nd window will seem on the other half of your display.
Adjusting Window Size in Split View
Once you have entered Split View, you can regulate each window’s length by dragging the divider between them. This permits you to allocate a greater area for one app if wished or regulate both home windows equally.
Exiting Split View
To go out of Split View, click on the inexperienced complete-display button again or press the Esc key.
Benefits of Using Split Screen Mode
Using Split Screen on Mac mode has many blessings, together with:
Keeping Two Windows Open Side-with the aid of-Side
Efficient window management is crucial for multitasking on your Mac. Split display mode lets you hold windows open side-with the aid of the side, making it easier to paint on a couple of duties simultaneously. Here are a few pointers on the way to use Split Screen on Mac mode efficiently.
Accessing Split Screen Mode
To get right of entry to cut up display screen mode, click and hold the green full-screen button in the pinnacle left nook of any window. The window will cut back and flow to at least one aspect of the laptop. Next, pick out some other window to fill the other 1/2 of the display. You can also drag a window from another computer or software into Split Screen on Mac mode by dragging it onto both facets of the display.
Adjusting Window Size
The bar that separates the 2 windows in cut-up display screen mode can be dragged left or right to alter the size of every window. This permits you to offer the greater area to one window if wanted. You also can double-click on the bar to make one window take up the whole display.
Switching Sides
If you need to exchange which window is on which side, genuinely drag it across the bar and drop it onto the other aspect of the laptop. This is useful if you need extra area for a selected project or need to view a selected document along with any other.
Using Other Windows
While in Split Screen on Mac mode, you could still get admission to other open windows by clicking and maintaining their icon within the Dock at the lowest of your screen. This will carry up all open home windows for that software, permitting you to select which one you want without leaving cut-up display screen mode.
Benefits of Split Screen Mode
Splitting your laptop into
halves with distinctive packages running has many benefits consisting of:
Third-Party Apps and Mission Control
Enter Mission Control with the task manipulate button or F3 key on your keyboard. It is a built-in tool in macOS that allows users to get admission to all open packages and computer systems in a single view. With the assistance of third-party apps, you can break up the screen on Mac, providing customers with extra options and flexibility.
Apps including Magnet, Spectacle, and Divvy are popular amongst Mac customers for their potential to Split Screens on Mac windows quickly and effortlessly. These apps permit you to resize home windows with the aid of dragging them to distinctive parts of the display screen or the usage of keyboard shortcuts. They additionally offer customizable hotkeys for even faster window management.
Using those 0.33-party apps can keep time and boom productivity when working on a couple of duties concurrently. For instance, if you want to reference records from an internet site while writing an e-mail, you may have each window open side-by means of-facet while not having to constantly switch between them.
However, it’s crucial to notice that a few 1/3-celebration apps might not be compatible with positive variations of macOS or other software established for your laptop. Be sure to check compatibility earlier than downloading any new apps.
With macOS Monterey, splitting displays has become even less complicated. Users can now use the menu bar to get the right of entry to Mission Control and drag programs into Split Screen on Mac mode immediately from there. This feature is convenient for individuals who select not to use 0.33-birthday party apps or need a greater streamlined experience.
Split Screen on Mac mode is also to be had in advance variations of macOS, consisting of Catalina but may additionally require additional equipment or changes to get entry to. In Catalina, customers can enter Mission Control by using swiping up with 3 palms on their trackpad or urgent the Mission Control button on their keyboard.

Split View Options
Split view is a function on Mac that allows customers to view apps aspect with the aid of a side. This characteristic, called split view, has been to be had for the reason that OS X El Capitan version 10.11 and has been to be had on all next variations of macOS. It provides an efficient way to multitask, allowing customers to paint extra productively.
To exit the breakup view, users can both click on and preserve the green complete-display button once more or use the option inside the menu bar. However, there also are other cut-up view alternatives that may be accessed by choosing “Options” in the menu bar even as in cut-up view mode. These options allow customers to adjust the scale of each app’s window or exit cut-up view altogether.
Adjusting window size is mainly beneficial while operating with distinctive sorts of content material simultaneously. For example, when writing a file while accomplishing studies online, it may be helpful to have one app occupy -thirds of the display screen at the same time as some other occupies one-third. This allows for smooth reference between files while not having to replace from side to side among tabs or home windows.
Another advantage of the usage of a breakup view is its capacity to grow awareness and reduce distractions. By dedicating 1/2 of the screen to 1 task and half to another assignment, users can keep away from being sidetracked with the aid of unrelated notifications or applications. This characteristic can help save you eye stress with the aid of reducing the want for regular switching among home windows.
Keyboard Shortcut for Splitting Screens Between Mac
Efficiency is prime, and using keyboard shortcuts is one manner to acquire that. For Mac customers who regularly paint with more than one program right now, splitting screens can be a recreation changer. Instead of manually resizing windows or the use of the trackpad to tug and drop, there’s a simple keyboard shortcut that can do the job in seconds: “Control + Command + F”.
Using this keyboard shortcut works in maximum programs, including Safari, Chrome, and Microsoft Word. Once you press the keys concurrently, your display screen will break up into the same halves – one on the left side and one on the right aspect. This feature lets you view different windows or files facet by facet without having to exchange them constantly.
Not handiest does this keep time, but, it also will increase productivity by permitting you to work extra effectively. You can write an email even as referencing a spreadsheet or studies records even as taking notes – all while not having to constantly switch from side to side between distinctive windows.
Customizing Keyboard Shortcuts for Splitting Screens
While “Control + Command + F” is the default keyboard shortcut for splitting monitors between Macs, it’s possible to customize it according to your possibilities. To do so:
- Go to System Preferences > Keyboard > Shortcuts
- Select “Mission Control” from the left-hand menu
- Click on every choice and enter your preferred keyboard shortcut
- Scroll down until you notice “Move left a space” and “Move right a space.”
By customizing your keyboard shortcuts for splitting monitors on Mac, you can create a workflow that fits your desires flawlessly.
Benefits of Using Keyboard Shortcuts
Keyboard shortcuts aren’t handiest useful for splitting monitors however additionally for different obligations which include replica-pasting text or final tabs in browsers quickly. Here are a few benefits of the usage of keyboard shortcuts:
Working in Split View and Troubleshooting Issues
Adjusting the Split Screen Size to Work with Multiple Windows
Working in break-up view mode on a Mac can be noticeably useful for multitasking. However, it’s vital to modify the scale of your split screen to paint with a couple of windows correctly. To try this, click and keep on the divider among your two home windows and drag it left or proper till you discover a cushy size.
If you need assistance locating the best length on your Split Screen on Mac, attempt experimenting with extraordinary sizes until you find one which works great for you. Remember that a few apps may not resize nicely when running in split view mode. If this occurs, strive to resize the app manually earlier than coming into cut-up view mode.
Using Keyboard Shortcuts to Work Efficiently in Split View
One of the excellent approaches to work successfully in cut-up view mode is by using keyboard shortcuts. Here are a number of the most valuable keyboard shortcuts for operating in break-up view:
- Control + Up Arrow: Enter complete-display screen mode
- Control + Down Arrow: Exit complete-display screen mode
- Control + Left Arrow: Move awareness to the window at the left
- Control + Right Arrow: Move cognizance to the window at the right
- Option + Click Green Full-Screen Button: Maximize the modern-day window
By utilizing those keyboard shortcuts, you could speedily switch between home windows and maximize your productivity even operating in split view mode.
Troubleshooting Issues with Split View
While operating in break-up view mode may be extraordinarily helpful, there are instances when problems may also rise. One commonplace issue is apps now not resizing properly whilst coming into cut-up view mode. If this occurs, attempt manually resizing the app before getting into the breakup view mode.
Another problem that can occur is an app turning unresponsive while operating in cut-up view mode. If this occurs, attempt quitting and reopening the app or restarting your pc.
Working with Multiple Desktops to Organize Split View Windows
If you often use multiple windows while working on your Mac, it can be helpful to apply multiple computers to organize your split-view windows. To create a brand new laptop, virtually swipe up with three fingers on your trackpad and click on the + button within the pinnacle right corner.
Once you have got multiple computers set up, you could without problems switch between them with the aid of swiping left or proper with 3 arms on your trackpad. This can assist keep your cut-up-view home windows prepared and make it less complicated to locate what you need while running on a couple of tasks at once.
Benefits of Using Split Screen on Mac
Increases Productivity using Allowing Users to Work on Multiple Applications Simultaneously
One of the most consequential advantages of using a split display on Mac is that it lets customers to paintings on a couple of programs simultaneously. This characteristic is handy for folks that need to multitask, together with writers, designers, and builders. With Split Screen on Mac, you can have or greater windows open aspect-by using-side and paintings on them at an equal time.
For instance, in case you are a writer operating on a weblog submission, you could have your research notes open in one window even typing in every other. Similarly, if you are a fashion designer developing an internet site format, you could have your design software program and reference snapshots open side-with the aid of aspect. In this manner, you shouldn’t transfer between one-of-a-kind windows or packages continuously. A fantastic read about Add Fractions.
Moreover, Split Screen on Mac permits users to allocate their workspace correctly. Instead of cluttering your computer with multiple home windows overlapping each other, you may organize them neatly facet-via-facet. In this manner, you mustn’t waste time resizing and repositioning windows manually.
Saves Time by Annihilating the Need to Switch Between Different Windows or Applications
Another benefit of the use of split display on Mac is that it saves time by way of disposing of the need to interchange between exclusive home windows or programs continuously. When operating on more than one responsibility concurrently, switching from side to side between distinct home windows can be tedious and time-eating.
With Split Screen on Mac, however, all the essential statistics are to be had in a single region without having to navigate through special menus or tabs. This makes it easier for customers to recognition on their work without getting distracted by pointless interruptions.
Furthermore, while the use of cut-up display screen mode with complete-display screen apps like Safari or Pages, customers can swipe left or right with three hands to switch between screens fast. This gesture-based totally navigation gadget now not only saves time but additionally enhances the person’s enjoyment by making it extra intuitive and herbal.
Provides a Better Visual Experience by way of Allowing Users to Compare and Contrast Information Side-by using-Side
Split display on Mac additionally affords a higher visual experience with the aid of allowing users to evaluate and contrast facts side-by using facets. This function is reachable to those who need to investigate records or compare distinctive versions of a document.
For instance, if you are an analyst working with spreadsheets, you may have or greater sheets open aspect-by using facets and examining the information quickly. Similarly, in case you are a creator editing a file, you can have the unique textual content and revised model open simultaneously for comparison.
Moreover, split screen mode lets customers adjust the size of every window consistent with their possibilities. This method can allocate extra space to the window containing vital statistics and less area for others.
Improves Multitasking Capabilities employing Enabling Users to Easily Drag and Drop Content Between Split Screens
Finally, a cut-up screen on Mac improves multitasking competencies using enabling users to without difficulty drag and drop content between Split Screen on Mac. This characteristic is specifically beneficial for those who need to transfer documents or images among exclusive applications regularly.
For instance, if you are a designer developing a brochure, you could drag a photo out of your reference folder into your layout software while not having to replace it between different home windows. Similarly, if you are a creator mentioning resources in your article, you can drag charges from your studies notes into your writing app seamlessly.
FAQs
1: What is a Split Screen on Mac?
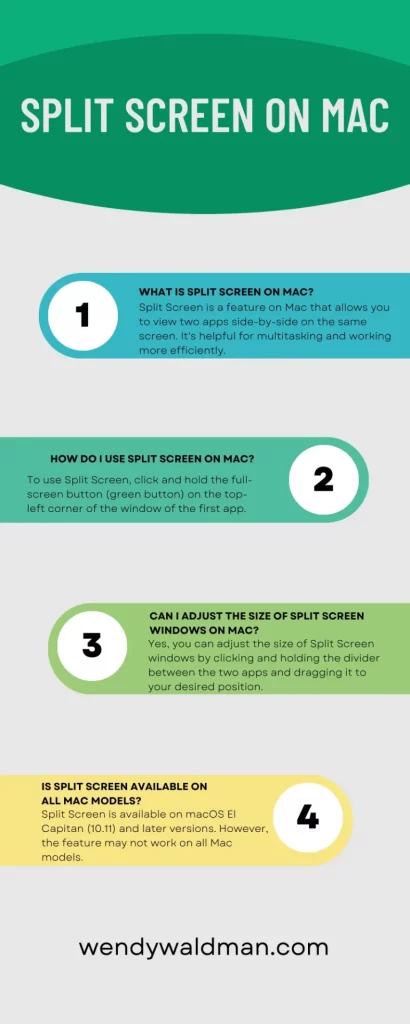
Split Screen is a feature on Mac that allows you to view two apps facet-by-way of-side on an identical screen. It’s useful for multitasking and operating more correctly.
2: How do I use Split Screen on Mac?
To use Split Screen, click and preserve the whole-screen button (green button) at the pinnacle-left nook of the window of the primary app. Then, drag the window to the left or proper aspect of the display screen. Next, select the second app to fill the opposite side of the display screen.
3: Can I modify the dimensions of Split Screen home windows on Mac?
Yes, you may regulate the dimensions of Split Screen home windows via clicking and retaining the divider among the 2 apps and dragging it in your favored role.
4: Is Split Screen to be had on all Mac fashions?
Split Screen is available on macOS El Capitan (10.11) and later variations. However, the function may not work on all Mac fashions. To check if your Mac supports Split Screen, visit the Apple menu > About This Mac > System Report > Graphics/Displays, and check if “Displays have separate Spaces” is supported.
Table: Split Screen on Mac
| Question | Answer |
|---|---|
| What is Split Screen on Mac? | Split Screen is a feature on Mac that allows you to view two apps side-by-side on the same screen. It’s helpful for multitasking and working more efficiently. |
| How do I use Split Screen on Mac? | To use Split Screen, click and hold the full-screen button (green button) on the top-left corner of the window of the first app. Then, drag the window to the left or right side of the screen. Next, select the second app to fill the other side of the screen. |
| Can I adjust the size of Split Screen windows on Mac? | Yes, you can adjust the size of Split Screen windows by clicking and holding the divider between the two apps and dragging it to your desired position. |
| Is Split Screen available on all Mac models? | Split Screen is available on macOS El Capitan (10.11) and later versions. However, the feature may not work on all Mac models. To check if your Mac supports Split Screen, go to the Apple menu > About This Mac > System Report > Graphics/Displays, and check if “Displays have separate Spaces” is supported. |

Jasper Bruxner is a passionate and versatile blogger with a keen eye for trends and a knack for crafting engaging content. As the founder of WendyWaldman.com, he has established himself as a trusted resource in a diverse range of niches, including food, tech, health, travel, business, lifestyle, and news. He tends to share the latest tech news, trends, and updates with the community built around Wendywaldman. His expertise and engaging writing style have attracted a loyal following, making him a respected voice in the online community.